Introduction
This post continues from where I left off previously installing Linux on my new Chromebook. I initially installed Debian and have documented the process separately. This post is concerned with installing Ubuntu, or more specifically Xubuntu which features the Xfce desktop environment as a lightweight alternatively to Ubuntu’s unity interface. Compared to Debian the process was far less involved and is the distribution I intent to use on the Chromebook going forward.
The following steps assume you have already entered developer mode on your Chromebook. Have flashed an alternative firmware and understand how to enter the firmware and boot from an external device. If not these initial steps are explained in my previous post.
Installation
First download the Xubuntu installation media from the distribution’s download site, I selected the LTS release, 22.04 at the time of writing.
Next write the installation media to a USB memory stick. On macOS I used balena Etcher for this.
Insert the USB memory stick into the Chromebook and boot from it.
When the GRUB bootloader screen appears, select “Try or install Xubuntu” using the up and down arrows on the keyboard followed by pressing “e” to edit the commands before booting.
Using the arrow keys, move the cursor down to the line beginning “linux” and advance to the end of the line.
Add “sdhci.debug_quirks=0x20000” and press “Ctrl + x” to boot the machine. I found this option while searching for an initial eMMC error that I believed was causing the installer to get stuck and fail to boot. Google lead me to a ticket in a gitlab instance, whereby a user was seeing something similar with their Linux powered device and suggested the debug quirk as a workaround. This option disables the eMMCs command queue engine capability, if I’ve managed to locate the correct flags in the driver.
Having booted into the installer you’ll find the trackpad really doesn’t want to work, it recognises the occasional movement but is generally badly behaved. If so, I experienced this too, it’ll be fixed later. To complete the installation I connected a USB mouse.
Once the installer is booted installation proceeds like any other.
Having completed the installation remove the memory stick and reboot as instructed. Allowing the Chromebook to boot into Xubuntu for the first time.
Fixing The Broken Bits
I was pleasantly surprised with Xubuntu, considering how much works out of the box.
There were only three things that weren’t working. The trackpad, audio and suspending to RAM. Along with one performance tweak to make regarding the eMMC.
Trackpad
The trackpad was too annoying not to fix first. It felt like some sort of strange calibration issue so I started nosing around the web based on that hunch.
I knew Ubuntu uses Wayland as its display server instead of the traditional Xorg so started looking at the Wayland documentation.
I located their page on touchpad pressure debugging, finding that the Elan touchpad in the Asus CR1 wasn’t known to the developers and as such there wasn’t a profile for it.
I followed the notes on the page and generated a profile. If you’ve got an Asus CR1100, you should be able to simply run the following to create the required configuration:
sudo mkdir -p /etc/libinput
sudo tee /etc/libinput/local-overrides.quirks << 'ENDL'
[Touchpad Pressure Override]
MatchUdevType=touchpad
MatchName=Elan Touchpad
MatchDMIModalias=dmi:*:*Google_Storo*
AttrPressureRange=10:8
AttrThumbPressureThreshold=30
AttrPalmPressureThreshold=60
AttrTouchSizeRange=75:50
AttrPalmSizeThreshold=300
ENDL
Having completed the pressure calibration the touchpad still wasn’t working, however it did work as expected in the libinput (the library providing Wayland with its use inputs) GUI debug tool.
Inspecting the Xorg log /var/log/Xorg.0.log I found that the much older synaptics driver was claiming the touchpad input in preference to libinput. The solution to this according to a post which I’ve lost was to simply uninstall the older and no longer used package, allowing libinput to claim the touchpad. To do this, open a terminal and run:
sudo apt-get remove xserver-xorg-input-synaptics
After this I rebooted, after which the trackpad began working normally.
Audio
The next item on my list was the audio which would have been a massive pain, had I not already experienced most of that pain while setting up Debian.
The Acer CR1 uses Intel’s integrated audio. This used to be handled by the snd_hda_driver. However it seems there’s a new player in town the snd_sof_pci_intel_icl driver. The Acer CR1 features a digital internal microphone, which isn’t supported by the earlier driver. As with the touchpad it appeared that the earlier driver was loading and claiming the hardware before the correct driver was able to. In this case we can simply backlist the older audio driver, allowing the newer one to claim the hardware. To do this we need to append an entry to the blacklist configuration:
echo "blacklist snd_hda_intel" | sudo tee -a /etc/modprobe.d/blacklist.conf
This gets the audio hardware working at the ALSA (Advanced Linux Sound Architecture) level, but not at the PulseAudio level (the sound server used by Ubuntu to allow multiple applications to access to the audio hardware at the same time).
PulseAudio previously had a configuration system of its own whereby you could describe a sound card’s input and outputs to it. While this still exists, it will, if available, read ALSA’s UCM (use case manager) configuration for the system’s sound hardware and generate its own runtime configuration from that.
Nosing around ChromeOS before replacing it with Xubuntu I discovered that the Google folks have developed their own lightweight sound server called CRAS (chrome audio server). CRAS similarly to PulseAudio makes use of ALSA’s UCM system to configure itself automatically.
I was therefore able to find a stash of UCM configuration files on the Chromebook. Unfortunately there were quite a few and it wasn’t immediately obvious which set were in use. Thankfully the ChromiumOS developer information site came to the rescue. The ASUS CR1100’s board name is “dedede”, which allowed me to find the appropriate UCM files, which are available in the ChromiumOS repositories here.
Unfortunately these files are in the original UCM format, while the ALSA project had moved onto their next generation UCM2 format. Thankfully they were pretty close as is, and converting them wasn’t much of a problem.
In order to add the configuration first create a directory for the sound card. The naming here is very specific as ALSA looks up configurations via the sound card names.
sudo mkdir /usr/share/alsa/ucm2/conf.d/sof-rt5682
Next create a configuration file for the sound card:
sudo tee /usr/share/alsa/ucm2/conf.d/sof-rt5682/sof-rt5682.conf << 'ENDL'
Syntax 3

SectionUseCase."HiFi" {
	File "HiFi.conf"
	Comment "Default"
}
ENDL
Then create the “HiFi” use case referenced by the sound card:
sudo tee /usr/share/alsa/ucm2/conf.d/sof-rt5682/HiFi.conf << 'ENDL'
SectionVerb {
	Value {
		FullySpecifiedUCM "1"
	}
	EnableSequence [
		cdev "hw:sofrt5682"
		cset "name='Headphone Jack Switch' off"
		cset "name='HPOL Playback Switch' off"
		cset "name='HPOR Playback Switch' off"
		cset "name='Stereo1 DAC MIXL DAC L1 Switch' 0"
		cset "name='Stereo1 DAC MIXR DAC R1 Switch' 0"
		cset "name='Stereo1 ADC L Mux' 0"
		cset "name='STO1 ADC Capture Switch' on"
		cset "name='RECMIX1L CBJ Switch' 1"
		cset "name='IF1 01 ADC Swap Mux' 2"
		cset "name='CBJ Boost Volume' 3"
		cset "name='STO1 ADC Capture Volume' 20"
		cset "name='Stereo1 ADC L1 Mux' 1"
		cset "name='Stereo1 ADC R1 Mux' 1"
		cset "name='Stereo1 ADC MIXL ADC2 Switch' 0"
		cset "name='Stereo1 ADC MIXR ADC2 Switch' 0"
		cset "name='Stereo1 ADC MIXL ADC1 Switch' 1"
		cset "name='Stereo1 ADC MIXR ADC1 Switch' 1"
                cset "name='PGA1.0 1 Master Playback Volume' 32"
                cset "name='PGA2.0 2 Master Playback Volume' 32"
                cset "name='PGA5.0 5 Master Playback Volume' 32"
                cset "name='PGA6.0 6 Master Playback Volume' 32"
                cset "name='PGA7.0 7 Master Playback Volume' 32"
	]
	DisableSequence [
	]
}

SectionDevice."Speaker" {
	Comment "Speaker"
	Value {
		PlaybackPCM "hw:sofrt5682,0"
		DspName "speaker_eq"
		PlaybackPriority 500
	}
	EnableSequence [
		cdev "hw:sofrt5682"
		cset "name='Left Spk Switch' on"
		cset "name='Right Spk Switch' on"
	]
	DisableSequence [
		cdev "hw:sofrt5682"
		cset "name='Left Spk Switch' off"
		cset "name='Right Spk Switch' off"
	]
}

SectionDevice."Headphones" {
	Comment "Headphones"
	Value {
		PlaybackPCM "hw:sofrt5682,1"
		PlaybackMixerElem "DAC1"
		JackControl "Headphone Jack"
		PlaybackPriority 600
	}
	EnableSequence [
		cdev "hw:sofrt5682"

		cset "name='Headphone Jack Switch' on"
		cset "name='HPOL Playback Switch' 1"
		cset "name='HPOR Playback Switch' 1"
		cset "name='Stereo1 DAC MIXL DAC L1 Switch' 1"
		cset "name='Stereo1 DAC MIXR DAC R1 Switch' 1"
	]
	DisableSequence [
		cdev "hw:sofrt5682"

		cset "name='Headphone Jack Switch' off"
		cset "name='HPOL Playback Switch' 0"
		cset "name='HPOR Playback Switch' 0"
	]
}

SectionDevice."HDMI1" {
	Comment "HDMI1"
	Value {
		PlaybackPCM "hw:sofrt5682,2"
		JackDev "sof-rt5682 HDMI/DP,pcm=2"
		PlaybackPriority 100
	}
	EnableSequence [
	]
	DisableSequence [
	]
}

SectionDevice."HDMI2" {
	Comment "HDMI2"
	Value {
		PlaybackPCM "hw:sofrt5682,3"
		JackDev "sof-rt5682 HDMI/DP,pcm=3"
		PlaybackPriority 200
	}
	EnableSequence [
	]
	DisableSequence [
	]
}

SectionDevice."HDMI3" {
	Comment "HDMI3"
	Value {
		PlaybackPCM "hw:sofrt5682,4"
		JackDev "sof-rt5682 HDMI/DP,pcm=4"
		PlaybackPriority 300
	}
	EnableSequence [
	]
	DisableSequence [
	]
}

SectionDevice."Headset Microphone" {
	Comment "Headset Microphone"
	Value {
		CapturePCM "hw:sofrt5682,1"
		CaptureMixerElem "Headset Mic"
		JackControl "Headset Mic Jack"
		CapturePriority 200
	}
	EnableSequence [
		cdev "hw:sofrt5682"
		cset "name='Headset Mic Switch' on"
	]
	DisableSequence [
		cdev "hw:sofrt5682"
		cset "name='Headset Mic Switch' off"
	]
}

SectionDevice."Internal Microphone" {
	Comment "Internal Microphone"
	Value {
		CapturePCM "hw:sofrt5682,5"
		CaptureChannels 4
		CaptureChannel0 0
		CaptureChannel1 1
		DspName "dmic_eq"
		CapturePriority 100
	}
}
ENDL
After which restart the machine.
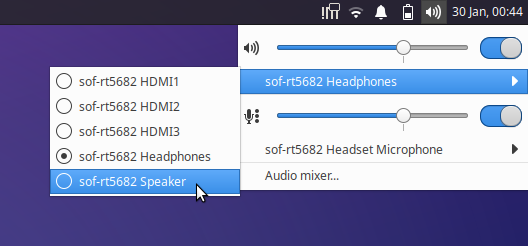
You should now have audio devices appear in the PulseAudio mixer. You may need to specifically select Speakers / Internal Microphone within the mixer settings, for example:
There’s a few other audio snafus to be aware of. The most annoying one is the internal microphone. You’ll find it works having applied the configuration above but no matter how high you turn up the volume it’s still too quiet.
While nosing around the Chromebook UCM files I spotted a strange looking property which hadn’t been mentioned in the ALSA documentation anywhere. The internal microphone had a property called “IntrinsicSensitivity” set against it. After some digging around I found a reference to this in the CRAS source code. It seems that CRAS applies software gain to the microphone input based on this value and the volume level setting.
I couldn’t find a way of applying a fixed software gain to the internal microphone input in PulseAudio, yet alone expressing my requirement though UCM. If anyone does please let me know. Short of writing my own PulseAudio module (which I briefly considered), I found that on the command line you can request the gain be higher than the 150% limit set in the audio mixer GUI.
Therefore the following command will increase the internal microphone volume to a reasonable level:
pactl set-source-volume 5 325%
In case the index changes, if the jq package is installed via:
sudo apt-get install jq
A more advanced and slightly longer version of the command may be used, to ensure the correct source is updated:
pactl set-source-volume $(pactl --format json list sources | jq 'map(select(.name == "alsa_input.pci-0000_00_1f.3-platform-jsl_rt5682_rt1015p.HiFi__hw_sofrt5682_5__source"))[0].index') 325%
The final audio related item that doesn’t work is automatic switching from Speaker to Headphones and back when they’re connected.
The Linux kernel version shipped with Xubuntu at the time of writing (5.15.0) doesn’t contain ALSA jack switch definitions for the headphone and headset microphone inputs. The codec detects their insertion / removal and informs the kernel which generates events in its input subsystem device (see /dev/input/by-path/ for a device ending in jsl_rt5682_rt1015p-event) however PulseAudio can’t read from those devices and instead relies on jack switch information provided by ALSA. Jack detection worked better in Debian, in that PulseAudio was aware of the status of each of the jacks when using the newer 6.0 series kernel available via Buster’s backports repository. The definitions appearing sometime between 5.15 and 6.0, can be seen here.
It may be possible to write a short script or application to read from the input device, parse the events and issue the appropriate commands to change from speakers to headphones and back but for now I’m happy just to select from the dropdown.
Suspend to RAM
The final non-working item is suspend to RAM. The fix here is relatively straight forward. The kernel had for some reason selected suspend-to-idle (s2idle) over suspend-to-ram (deep) mode, as described in the admin guide.
This can be checked by:
cat /sys/power/mem_sleep
The following should be returned:
[s2idle] deep
Indicating the s2idle is currently selected.
The admin guide hints that the default mode can be overridden by passing the parameter mem_sleep_default on the kernel command line.
We can do this by editing the grub configuration file /etc/default/grub and adding the following to the GRUB_CMDLINE_LINUX_DEFAULT property:
mem_sleep_default=deep
Followed by updating grub’s configuration files:
sudo update-grub
eMMC Performance
I didn’t initially realise but the installer carried across the eMMC debug_quirks set for the installer over to the installation automatically.
Once installed it seems that the can be removed. Again by editing the grub configuration file /etc/default/grub and removing the following from the GRUB_CMDLINE_LINUX property:
sdhci.debug_quirks=0x20000
After which the grub config again needs to be updated with:
sudo update-grub
If you’ve managed to follow along this far, you’re all done, enjoy Ubuntu (or Xubuntu) on your Chromebook.
Additional Notes
zRAM Compressed Swap
The default Ubuntu installation includes a swap file on the eMMC drive. In order to reduce wear and tear on the drive, while also improving performance I decided to implement zRAM based swap as ChromeOS itself now does. zRAM (formally compcache) is a kernel module which creates a compressed block device in RAM. This compressed block device can be used as swap, to be used in preference the eMMC based swap. I’ve based my notes below on a combination of a TechRepublic article and notes from Gentoo.
First instruct the kernel to load the zram module automatically:
echo "zram" | sudo tee /etc/modules-load.d/zram.conf
Next set the module options such that a single zram device will be created:
echo "options zram num_devices=1" | sudo tee /etc/modprobe.d/zram.conf
Next create a udev rule to set the zram device size and compression algorithm, before preparing it as a swap device:
echo 'KERNEL=="zram0", SUBSYSTEM=="block", DRIVER=="", ACTION=="add", ATTR{disksize}=="0", ATTR{disksize}="2G", ATTR{comp_algorithm}="lzo-rle", RUN+="/sbin/mkswap $env{DEVNAME}"' | sudo tee /etc/udev/rules.d/99-zram.rules
Next add the new swap partition to the fstab file such that it gets mounted automatically:
echo "/dev/zram0 swap swap pri=16383 0 0" | sudo tee -a /etc/fstab
This will cause the zram device to be mounted as additional swap, with a priority much higher than the eMMC’s swap partition, encouraging the kernel to prefer it.
Finally reboot.
Once back at the desktop, open a terminal and check for the new swap with:
sudo swapon -s
If all has gone well you should see /swapfile (the ubuntu default) and /dev/zram0, the new compressed RAM based swap partition.
GTK Theme
I found the default Xubuntu GTK theme “Greybird” a bit too bright for my taste. After much searching online came across the incredible arc-theme and a fork which has continued development from where the previous developer left off. Better yet there’s a package available for it in the Ubuntu repositories, installation is as simple as:
sudo apt-get install arc-theme
Followed by selecting one of its variants (I went for Arc-Dark) in both the “Appearance” and “Window Manager” settings panels.
Panel Profiles
I wasn’t too much of a fan of the Ubuntu Xfce layout upon installation….it reminded me a little too much of Windows’s start menu search. Thankfully the Xfce panel profiles application is able to restore the default Xfce 4.16 profile.
sudo apt-get install xfce4-panel-profiles
xfce4-panel-profiles
Leave a Reply